Tuesday, January 31, 2012

New Design Team and a Challenge!

Hi everyone!
I have a big announcement: I am part of the Design Team for My Time To Craft Challenge Blog!
Yippee!! I'm so excited, it's my first project and posting as a DT member.
The challenge this week is:
I made a card using an image from Phindy's Place called Birdie, also used my Cricut and Sentimentals cartridge for the die cut frame and Elegant cake for the flourishes.


The designer paper is from Authentique Paper and added some sewing around and distressing the borders a little for added texture.


The final touch a ribbon and flower with button center and twine bow.

I can't wait to see your wonderful creations!!!
I would like to enter this card in the following challenges:
Thanks!
Love,
Julia 

Monday, January 30, 2012

New Alice in Wonderland line at The Stamping Boutique

Hi everyone!
I wanted to tell you all about the new digital stamp line of The Stamping Boutique:
Alice in Wonderland
How about a peek?


Aren't they fantastic?  I can't wait to get them printed.
Love,
Julia

Sweet candy at Liva's Crafts!!!

Liva is celebrating that she reached 50 followers and is giving away this wonderful candy:

Just visit her Blog: Liva's Crafts and follow the rules. 
Good Luck!
Hugs,
Julia

Sunday, January 29, 2012

Sweet Valentine's Day Card and Treat Box with a Tutorial!

Valentine's Day is fast approaching and I have begun working on my cards and gifts.
This card will be for someone extra special in my life and I am sure she will love it:
Images: Audrey's Heart by The Stamping Boutique
I also needed a Treat Box for a wonderful friend and this is the finished project:
Images: Wagon Full of Hearts by The Stamping Boutique


It was so much working on this treat box that I made a tutorial and am sharing it with you!

Window Treat Box Tutorial
Images: Audrey's Heart and Wagon Full of Hearts by The Stamping Boutique
Supplies:

  • 9 in x 8 in - white cardstock
  • 11 in x 4 in - red cardstock
  • 12 in x 6 in -pink cardstock
  • 12 in x 6 in - patterned paper
  • 2.75 in x 3.75 in - acetate
  • 2.5 in x 3.5 in - colored image, optional
  • twine
  • strong adhesive
Download Template: Here, adjust printer settings for legal paper, page scaling: none
How  to:

Cut a 9 inch x 8 inch, piece of cardstock.
On the wider side score at 0.5 in, 1.5 in, 2.5 in, 6.5 in, 7.5 in, and 8.5 inches.
On the other side score at 0.5 in, 1.5 in, 2.5 in, 5.5 in, 6.5 in, and 7.5 inches.
Using the template provided, as you guide cut out the box.

 Fold along the dashed lines (blue).

Add adhesive to the small side flaps and assemble the base of the box.
Add adhesive to the four flaps on the sides and fold them inside the box, making sure that they are aligned with the sides of the box.

Cut a piece of cardstock 11 inches x 4 inches.
Score and fold at 3in, 4in, 7in, 8 in and 11 inches.
Using a die cut or punch create a window on one of the outside flaps.

Cut the following pieces:
    From patterned paper:
  • 2 – 2.75 in x 3.75 in (punch a window using the same punch used to create the window on the cover)
  • 2 – 3.5 in x 0.5 in
  • 2 – 2.5 in x 0.5 in
   From cardstock:
  •  1 – 2.75 in x 3.75 in
  •  2 – 3.75 in x 0.75 in
  •  2 - 2.75 in x 0.75 in
  •  2- Frame pieces of choice for the window opening
  From acetate:
  •  1 - 2. 5 in x 3.5 in
Add a piece of acetate to the inside of the cut:
Add the patterned paper background to the front of the box; remember to add the twine.
Add a frame around the window.
Repeat for the inside of the cover.
Assemble the side panels and the colored image.
Glue side panels and image to the outside of the cover piece (being careful of the orientation of the image).
Glue side panels to the base box.
Apply a strong adhesive to the center panel and glue the base box.

Cut a piece of patterned paper 2.75 inches x 3.75 inches and glue to the inside flap.
Glue a piece of plain cardstock for journaling.

Add adhesive to the folded sides of the cover.

Glue the base box to the cover sides.
This is the finished project:
Opened View
Closed View
I just had to share one photo of the box filled with candies!!
Have fun!
Hugs,
Julia

Sunday, January 22, 2012

New challenge blog!

Krafty Girls is a new challenge blog that will be hosting challenges for those of us who love a great challenge to get us crafting!  They are giving away a Cars Cricut cartridge to celebrate and help spread the word about their new blog!  You can find information about the blog and the giveaway here - the first challenge will be posted on February 14!!
Love,
Julia

Saturday, January 21, 2012

Gothic Girl

Hi everyone!!!
Here is a card that I made using an image by The Paper Shelter. The image is called Gothic Girl and can be found here.
The Papert Shelter is hosting a Design Team and they asked for the creations not to be covered in too many decorations so they can really see our coloring skills.
I love coloring, so I decided to create a little something for this challenge - DT call:

To add some interest to the background I used a Tim Holtz stamp.

Thanks!
Love,
Julia

Wednesday, January 18, 2012

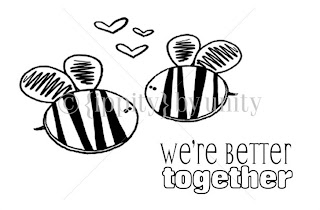
"Bee" Better Together

Hi Everyone!
Chick Challenges with {ippity} is a blog dedicated to presenting sketch challenges to use with your {ippity} stamps.
I wanted to create a fun, but romantic card.
Did some faux stitching, feel it adds movement to the bees.
Used the Cricut die cutting machine and the cartridges: Plantin SchoolBook and Sentimentals for the hearts and the tag.
Created a heart watermark effect at the bottom of the card with VersaMark pad and the heart stamp.
Here is the card:

This is the sketch:

The stamp sets used were:
"Bee" Better Together
Loads of  Love
I'm entering this card in the following challenges:
Thanks!
Love
Julia

Inspiration for Challenge 13: Hearts, Hearts and More Hearts at Get Hippity with Ippity

Good morning everyone!!!
The theme for Challenge 13 at Get Hippity with Ippity is:
Hearts
One, two, three...or as many as yo desire. It does not have to be Valentine related. We want to see whatever and wherever your creativity takes you. It could be a card, an ATC, collage, mixed-media, etc., but we must see a heart, or as many hearts as you want to show us.
Remember you must become a follower of our challenge blog. Also if you use an Ippity or a Unity stamp in your project, your name is in the drawing twice. If you do use an Ippity or a Unity stamp, please leave a comment and let us know which one. We do appreciate that one little step extra.
The prize is an {ippity} set of your choice from the {ippity} Sales Blog.
I have two projects to share with you today.
For this card I used the following techniques: masking and heat embossing.
  
I am entering this card in the following challenge: Cooking It Up #87 - Show me some Pink Posies with Pearls,  Challenge 20 - Love is in the Air at Crafter's Companion, and Alota's Heart Challenge


I used the following Ippity stamp sets:
Music of My Heart
Now and Always

Here is the second card, for the heart base card I used the Cricut die cutting machine and Wild Card cartridge, also did some dry embossing to the front side of it.

I am entering this card in the following challenge: Inky Impressions Challenge - Shape It Up!


I used the following Ippity stamp sets:

Your Friendship, My Cup of Tea


Loads of Love


I can't wait to see your creations!
Thanks!
Love
Julia

Tuesday, January 17, 2012

Die Cuts Challenge at The Stamping Boutique!

The Stamping Boutique has a new challenge and it is a fun, fun ... fun one. We all love die cuts and yeap, you guessed it, our challenge is:

Anything But a Card Challenge at The Crafter's Cafe Challenge Blog

We have a new challenge at The Crafter's Cafe Challenge Blog and the theme is:
Anything But a Card
I'd like to thank our generous sponsor The Stamping Boutique. The winner will receive 3 images of their choice.
Here is my piece of inspiration:
Image: Bubble Fairy By The Stamping  Boutique
Side View
The gift bag was created using the Cricut and Tags, Bags, Boxes and More cartridge.
I am entering this card in the following challenges:

Love,
Julia

Monday, January 16, 2012

New Challenge at Paper Creations Ink

Hi everyone!
Paper Creations Ink has a new challenge and it is a lovely one. The challenge is:
I decided to create a fun, sweet and of course romantic teepee card: 
Image: Lovers Grumpies by Smeared Ink
Image:  Smittie Grumpie  by Smeared Ink
Image:  Heart Grumpie  by Smeared Ink
Side View
The hearts and squares for the card were cut with my Cricut, used the Plantin SchoolBook cartridge.
I used some of my favorite colors for this card: pink, red and blue.
Our Sponsor for this challenge is Smeared Ink.

For more information please visit Paper Creations Ink.
I am entering this card in the following challenges:
Thanks!
Love,
Julia
Related Posts Plugin for WordPress, Blogger...