Showing posts with label tutorial. Show all posts

Wednesday, January 10, 2018

Washi Tape Challenge at Crafting By Designs

Hello!
It is time for our newchallenge at Crafting by Designs.
The theme is Washi Tape and this is a almost month long challenge.
Our sponsor for this challenge is A Day for Daisies
Here is my project
Image: Facebook Freebie
Image was colored with Prisma coloring pencils, Sharpie markers and Distress Ink.
The Crazy Quilt (Washi) background was lots of fun to make, please see the collage for a step by step.
For more inspiration hop over to Crafting By Designs! You have to see what the design team created for this challenge. We can't wait to see your wonderful creations!!!
I would like to enter this creation into the following challenges:

Thanks!
Hugs,
Julia


Edited on February 3, 2018:

This card made Top Pick at Pause Dream Enjoy Challenge!
Thank You!!

Monday, January 14, 2013

MIxed Media at Crafting By Designs

Hi everyone!
It's time for a new Mixed Media project at Crafting By Designs.
For my project I made some twinchies.
What exactly is a twinchie? It’s a two inch by two inch piece of artwork. You can use any media you like to make it, paper, fabric, wood, metal…the list goes on! 
Heavy watercolor paper works perfectly for making this, but if you like to recycle you could use a cereal packet or other similar packaging, or even a postcard.
You can make up a set to keep for yourself, or you can start to trade them in swaps the same as you would for ATC's.
Twinchies are fun and completely addictive.

Here are is a photo tutorial on how I did mine:
Dylusions Ink spray: London Blue, Pure Sunshine and Bubblegum Pink
Spray with water.
Cut to size, don't discard the little pieces.
Distress the borders with Ranger Distress Ink: Black Soot.
Paint a square in the center using water thinned gesso.
Stamp a small image, I used Inkadinkado Pattern Play Inchie Stamp Set.
This is how they look.
Color the images.
I used some recycled cardboard for added sturdiness.
Added some glitter to the scraps, this can be used to add details to any project.
Here are the finished twinchies:


I used one of the twinchies to make a card: 
I can't wait to see what everyone creates!
I would like to enter this project in the following challenges:
Thanks!
Love,
Julia

Sunday, December 16, 2012

Guest Designer for Quirky Craft Challenges!

More Exciting News!!!!
I was asked to be a Guest Designer for:
Today begins a new challenge and the theme is:
Last Minute Gifts!
Oh my, who hasn't been here, but you will find amazing ideas by the Design Team.
Our fabulous sponsor are Doodle Dragon Studios, Crafty Ribbons and The Stamping Boutique.
Here is my inspiration piece:
Image: Santa's Sleigh, Doodle Dragon Studios


Pillow Box Tutorial 
Download Template: Here, adjust printer settings for letter paper, page scaling: none
How  to:

Cut the template on cardstock of choice.
Score and fold along the dashed lines.
 Add double sided tape where indicated on template. 
 Assemble the box.
You are ready to decorate. I used the image and added a sliding tag.
The sliding tag was really easy to make, I just made to tags and added the sentiment, the placed it behind the image, were I didn't add glue.
Hope you like it.
For more inspiration hop over to Quirky Crafts Challenges! You have to see what the Design Team created for this challenge. We can't wait to see your wonderful creations!!!
I would like to enter this project in the following challenges:
Thanks!
Love,
Julia

Sunday, January 29, 2012

Sweet Valentine's Day Card and Treat Box with a Tutorial!

Valentine's Day is fast approaching and I have begun working on my cards and gifts.
This card will be for someone extra special in my life and I am sure she will love it:
Images: Audrey's Heart by The Stamping Boutique
I also needed a Treat Box for a wonderful friend and this is the finished project:
Images: Wagon Full of Hearts by The Stamping Boutique


It was so much working on this treat box that I made a tutorial and am sharing it with you!

Window Treat Box Tutorial
Images: Audrey's Heart and Wagon Full of Hearts by The Stamping Boutique
Supplies:

  • 9 in x 8 in - white cardstock
  • 11 in x 4 in - red cardstock
  • 12 in x 6 in -pink cardstock
  • 12 in x 6 in - patterned paper
  • 2.75 in x 3.75 in - acetate
  • 2.5 in x 3.5 in - colored image, optional
  • twine
  • strong adhesive
Download Template: Here, adjust printer settings for legal paper, page scaling: none
How  to:

Cut a 9 inch x 8 inch, piece of cardstock.
On the wider side score at 0.5 in, 1.5 in, 2.5 in, 6.5 in, 7.5 in, and 8.5 inches.
On the other side score at 0.5 in, 1.5 in, 2.5 in, 5.5 in, 6.5 in, and 7.5 inches.
Using the template provided, as you guide cut out the box.

 Fold along the dashed lines (blue).

Add adhesive to the small side flaps and assemble the base of the box.
Add adhesive to the four flaps on the sides and fold them inside the box, making sure that they are aligned with the sides of the box.

Cut a piece of cardstock 11 inches x 4 inches.
Score and fold at 3in, 4in, 7in, 8 in and 11 inches.
Using a die cut or punch create a window on one of the outside flaps.

Cut the following pieces:
    From patterned paper:
  • 2 – 2.75 in x 3.75 in (punch a window using the same punch used to create the window on the cover)
  • 2 – 3.5 in x 0.5 in
  • 2 – 2.5 in x 0.5 in
   From cardstock:
  •  1 – 2.75 in x 3.75 in
  •  2 – 3.75 in x 0.75 in
  •  2 - 2.75 in x 0.75 in
  •  2- Frame pieces of choice for the window opening
  From acetate:
  •  1 - 2. 5 in x 3.5 in
Add a piece of acetate to the inside of the cut:
Add the patterned paper background to the front of the box; remember to add the twine.
Add a frame around the window.
Repeat for the inside of the cover.
Assemble the side panels and the colored image.
Glue side panels and image to the outside of the cover piece (being careful of the orientation of the image).
Glue side panels to the base box.
Apply a strong adhesive to the center panel and glue the base box.

Cut a piece of patterned paper 2.75 inches x 3.75 inches and glue to the inside flap.
Glue a piece of plain cardstock for journaling.

Add adhesive to the folded sides of the cover.

Glue the base box to the cover sides.
This is the finished project:
Opened View
Closed View
I just had to share one photo of the box filled with candies!!
Have fun!
Hugs,
Julia

Sunday, March 20, 2011

Sour Cream Container Tutorial

For this week’s tutorial I wanted to share a special project: Sour Cream Container.


This is a two for one, because there is also flower tutorial included.

Here is the link for the templates for Cricut using Design Studio: download.

You can watch the video tutorial here.


To all of you who have taken from your time to visit my blog:


Thanks!

Love;

Julia

Tuesday, March 15, 2011

Accordion Card

These tutorials will help you create an accordion card like the one featured on my previous blog post.

Accordion Card
 Materials and equipment:
  • Cardstock
  • Cricut
  • Design Studio (DS)
  • Cricut cartridge:
  • Bone folder

 Procedure:


1. Cut the card using the DS file provided (download).
    If you don’t have DS, Circut or the cartridge don’t worry, I have a template (follow the link, download and cut)
2. Score card with the bone folder where shown:
 
  
3. Fold the card (look at picture for reference). Use the bone folder for a crisp fold.
 
  
4. Decorate as desired, Have fun and be creative!

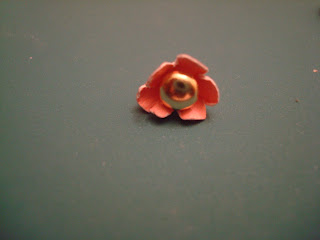
Miniature paper flowers


 Materials:

  •  Cardstock with white core
  • Mini brads
  • Misting bottle
  • Water

Procedure:

1. Cut four (4) flower shapes, I used Cricut cartridge Plantin Schoolbook, but you could use any flower die cut you have.
2. If your flower cut out doesn’t have a perforation in the center make one, being careful not to make it to big.

3. Place the flower shapes on a paper towel and spray lightly. Work one (1) at a time and don’t wet too much or they will break when you try to work with them.

4. Take the flower in your hands and squeeze it as tight as you can (see picture). This will give the shape to the petals and will bring out some of the white of the cardstock core.

5. Repeat the last step for all the flowers.

6. Allow to dry completely.
7. Open the flowers. Begin assembling the flower using the brad as the center and the smallest flower, follow all the way to the biggest.

8. Play with the petals until you reach the desired shape.

9. There you have it. Beautiful mini flowers for your projects.


Related Posts Plugin for WordPress, Blogger...