Hi everyone!
I have a big announcement: I am part of the Design Team for My Time To Craft Challenge Blog! Yippee!! I'm so excited, it's my first project and posting as a DT member. The challenge this week is:
I made a card using an image from Phindy's Place called Birdie, also used my Cricut and Sentimentals cartridge for the die cut frame and Elegant cake for the flourishes.
The designer paper is from Authentique Paper and added some sewing around and distressing the borders a little for added texture.
The final touch a ribbon and flower with button center and twine bow.
I can't wait to see your wonderful creations!!!
I would like to enter this card in the following challenges:
Hop over the blog to see some wonderful creations.
I had so much fun with this theme, that I decided to create two projects.
To read about the first project featuring Medusa, please follow this link.
The second project is a party decoration and it features: Frankenstein, Halloween Monster and Halloween Vampire:
This image can be found in The Stamping Boutique Shop.
For the complete rules follow this link.
I am entering this project in the following challenges:
Hop over the blog to see some wonderful creations.
I had so much fun with this theme, that I decided to create two projects.
This is my first project, an easel card featuring Medusa:
This image can be found in The Stamping Boutique Shop.
For the complete rules follow this link.
I am entering this card in the following challenges:
This is my card for this week's Designed2Delight free image challenge The first Friday of the month, Faith offers a free image and if you use that in a project before next Friday you get a new free image in your mail. And if you don´t play that week, you can alway catch up buying the image.
I decided to use the image three times.
I'm entering this image in the following challenges:
The past week has been kind of hectic. After the hurricane, I thought that a lot of time would pass before I sat down and made another card. Well, thanks to a wonderful group of people I have been able to create some cards, and it has been fun.
Today’s card is an inspiration card.
Love the sentiment, a stamp from the set Fall for You by Unity.
The image is from Anne’s Digital Art (Anne Fenton) and I feel in love with it as soon as I saw it.
Used three different die cuts to add some interest to the background, jewels for sparkle and a bow to finish everything.
I am entering this card in the following challenges:
When I saw the color combo...uh...thought this is impossible, no way I can do something with this colors. Days passed and no ideas came to me, really not a clue as of what to do.
Today I made another baby card. The image is from MelJen’s Designs.
Used twine for the two bows and added two buttons. The sentiment is a clear sticker by Paper Crafts
I am entering this card in the following challenges:
For this challenge I used an image from Tellen's Place Designs
Challenge Details:
Create an A2 sized card (4.25 x 5.5 inches) using this digi from Tellen's Place Designs. The digi is to be hand colored using markers -- Copics, SU! Stampin' Write Markers, ProMarkers -- any marker sets you have/use. The card needs to be made using the following cardstock colors: Purple, Fuchsia/Magenta, and Black. As part of the use of this image, it must be matted using all 3 cardstock colors, also use cream colored lace ribbon on the project.
Thanks!
Love, Julia
Wednesday, May 18, 2011
This is a sweet card. The image is from StampFairy and is so cute and spring looking that I couldn’t resist. For embellishment three beautiful paper flowers from Prima and some jewels.
Card recipe:
Cardstock: DCWV
Image: StampFairy
Embellishment: Prima flowers
Working this card was fun! This digi stamp is from The Stamping Boutique. The buttons give it a special touch and add dimension. This image has fluidity and movement, love it!
This card is a special one, for me it represents the spirit of motherhood. This digi stamp is from The Stamping Boutique.
Used very bright colors for the image and the background; added lace and a bow topped with a beautiful button that tied it all.
Loved this digi stamp from The Stamping Boutique. Working with it was gave me the sense of freedom, so much space for being creative!
The background was embossed with Polka Dots folder from Provo Crafts and it was inked with silver ink.
Time flies, or so they say. Each day I plan to do a million things and by the end of the day I realize that most of them are still pending.
This past week I was able to make some cards and posted them on Simply Scrapping Crafts (SSC) Site as part of the challenges.
March 2, 2011 Card Challenge: Stamp a background, but make it (at least partly) your cards focal point
March 4, 2011 CAS Challenge: make a 3-D effect as the focus of your card.
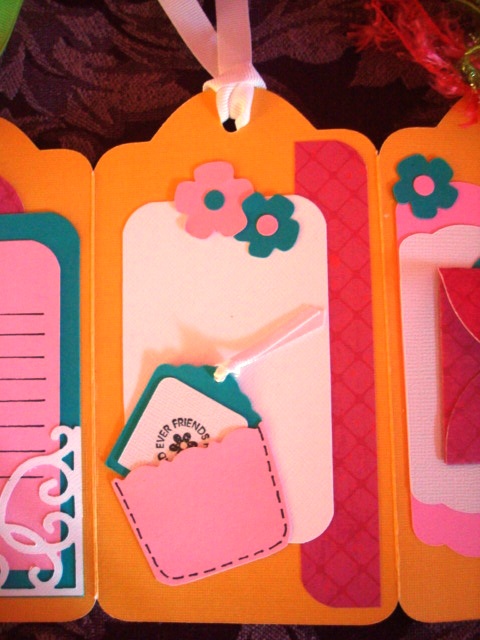
I also worked on a very special project: an accordion card.Each detail made me fall in love with it.The dig stamp is beautiful, and the flowers were handmade.
The base of the card was made with the Design Studio and my Cricut.
The flowers were made using the Cricut to cut out the shape. Here is a link for the tutorial.
Some embossing was done on the cover of the card, as a background accent.
Each page has a special detail, they are interactive and fun.
Today I woke up and a million ideas came to me, then all of the sudden they were gone.
Recently this has happened with some frequency. Don’t know why, maybe the day to day responsibilities take over my creativity and I feel empty.
Panic mode overcame the first time this happened. But then I began taking notes of the ideas as they came to me, and it worked.
So a collection of journals, sketching pads and notebooks became part of my day to day routine and my home and working space. I even have a small notebook in my purse, so If any idea appears, there is no reason for me not to remember.
I get so many compliments each time the little notebook comes out of my purse, that I began making them for friends and family, not long after that other people were asking for them.
Here are some examples:
They are really easy to make and something I want to share with you!
Mini Notebook
Materials:
• Patterned paper
• Solid color paper or cardstock
• Notebook 3 ¾ in. x 4 ½ in.
• Double sided tape
• Glue
• Decorations: ribbons, jewels, digital stamp
Instructions:
1. Cut two pieces 3 ¾ in. x 5 ½ in. for the outside of your notebook, patterned paper ( A pieces)
2. Cut a piece 1 ¼ in. x 4 ½ in. for the spine, solid color paper or cardstock (B piece).
3. Cut two pieces 3 in. x 4 ¼ in. for the inside cover, solid color paper or cardstock (C pieces).
4. Score A pieces ½ inch from the borders on three sides of the paper, don’t touch one of the 5 ½ in. side. Fold the scores using a bone folder.
5. Trim the corners as shown in next photo.
6. Add heavy duty double sided tape to both A pieces.
7. Using the scores in these pieces as guides, cover the front and back of the notebook, notice that there is a small area on the side that’s not covered.
8. Score B pieces ½ in. from the border on both sides of the paper. Add heavy duty double sided tape to the B piece (spine).
9. Attach the spine to notebook.
10. Tie white ribbon around front cover.
11. Add double sided tape to C pieces and attach to inside of covers. This will give a nice finishing touch.
12. Now you are ready to decorate the notebook.
13. I used a digi stamp from: http://papergardenprojects.com/store/, the name is Coneflowers and it’s a freebie. Used coloring pencils to put the finishing touches to this design.
14. Use an oval shape die cut and distress the borders to add the finishing touch to this piece.