Showing posts with label Design Studio. Show all posts

Saturday, July 30, 2011

Bookmark!

Loved this color combo from The Outlawz. Inmediatly thought of a different project: a bookmark.

Used my Cricut, Design Studio, Plantin Schoolbook and Elegant Cakes to create it.

The color combo:
Add beads or buttons
I am entering this card in the following challenges:
Thanks!
Love
Julia

Sunday, April 24, 2011

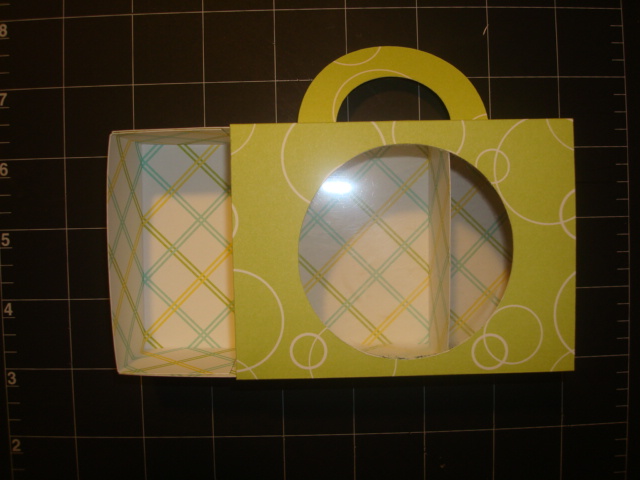
Sweet Spring Treat Box


Materials: 
  • Martha Stewart patterned cardstock: double sided
  • Ribbon
  • K & Co. flowers
  • Transparency 
  • Double sided tape

 Here is the link for the templates for Cricut using Design Studio: Download


How to:

Cut the pattern using Cricut and Design Studio. The cartridge used was Plantin SchoolBook.


Outside:

Cut ½ inch from the bottom.

Score and fold at 1 ½ inch, 4 inch, 5 ½ inch, 8 ½ inch and 9 ½ inch.

Cut a piece of transparency 3 inches x 4 inches and glue to the inside of the window.

Put double sided tape to the top flap, the one with the handle and adhere to the bottom flap closing the box.


Inside:

Score and fold at 1 3/8 inch on all sides.


 Cut as cut as shown careful not to pass the point of intersection at the corner.

 Glue the flaps to the sides forming the box.


Decorate the outside of the box.


There you have it.  Have fun with this project.

Love

Julia

Tuesday, March 15, 2011

Accordion Card

These tutorials will help you create an accordion card like the one featured on my previous blog post.

Accordion Card
 Materials and equipment:
  • Cardstock
  • Cricut
  • Design Studio (DS)
  • Cricut cartridge:
  • Bone folder

 Procedure:


1. Cut the card using the DS file provided (download).
    If you don’t have DS, Circut or the cartridge don’t worry, I have a template (follow the link, download and cut)
2. Score card with the bone folder where shown:
 
  
3. Fold the card (look at picture for reference). Use the bone folder for a crisp fold.
 
  
4. Decorate as desired, Have fun and be creative!

Miniature paper flowers


 Materials:

  •  Cardstock with white core
  • Mini brads
  • Misting bottle
  • Water

Procedure:

1. Cut four (4) flower shapes, I used Cricut cartridge Plantin Schoolbook, but you could use any flower die cut you have.
2. If your flower cut out doesn’t have a perforation in the center make one, being careful not to make it to big.

3. Place the flower shapes on a paper towel and spray lightly. Work one (1) at a time and don’t wet too much or they will break when you try to work with them.

4. Take the flower in your hands and squeeze it as tight as you can (see picture). This will give the shape to the petals and will bring out some of the white of the cardstock core.

5. Repeat the last step for all the flowers.

6. Allow to dry completely.
7. Open the flowers. Begin assembling the flower using the brad as the center and the smallest flower, follow all the way to the biggest.

8. Play with the petals until you reach the desired shape.

9. There you have it. Beautiful mini flowers for your projects.


Thursday, March 10, 2011

New projects...


Time flies, or so they say. Each day I plan to do a million things and by the end of the day I realize that most of them are still pending.

This past week I was able to make some cards and posted them on Simply Scrapping Crafts (SSC) Site as part of the challenges.

March 2, 2011 Card Challenge: Stamp a background, but make it (at least partly) your cards focal point

March 4, 2011 CAS Challenge: make a 3-D effect as the focus of your card.

  
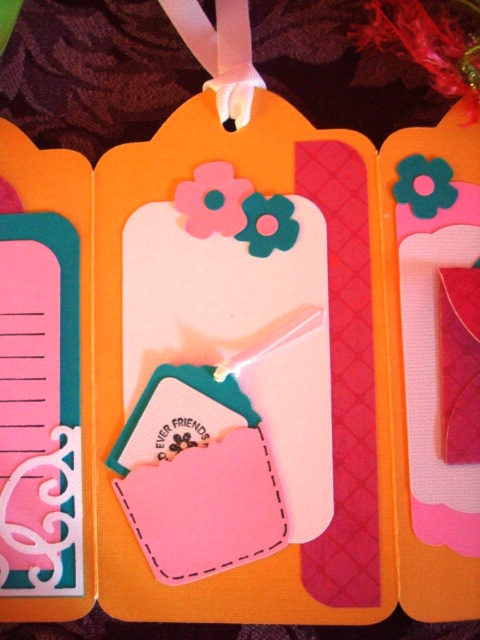
I also worked on a very special project: an accordion card.  Each detail made me fall in love with it.  The dig stamp is beautiful, and the flowers were handmade.
The base of the card was made with the Design Studio and my Cricut.
The flowers were made using the Cricut to cut out the shape.  Here is a link for the tutorial.

Some embossing was done on the cover of the card, as a background accent.
Each page has a special detail, they are interactive and fun.

Hope you enjoy this card as much as I do.

Thanks for visiting.

Love,

Julia
Related Posts Plugin for WordPress, Blogger...